Learn about the impressive Bellman Espresso Brewer and its features. We’ll also cover the brewing process, and expert tips for perfect espresso.
Do you crave the rich aroma and bold flavor of fresh brewed espresso? But cost is an issue – many machines are expensive, and take up a lot of valuable counter space. How can you reconcile these two differences? Look no further than the Bellman Stove Top Espresso Brewer! This brewer will deliver the perfect shot of espresso in the comfort of your own kitchen.
In this guide, we dive into the world of the Bellman Stove Top Espresso Brewer. Grab your favorite coffee mug, and let’s embark on a journey to master the art of espresso brewing.
What is a Bellman Brewer?
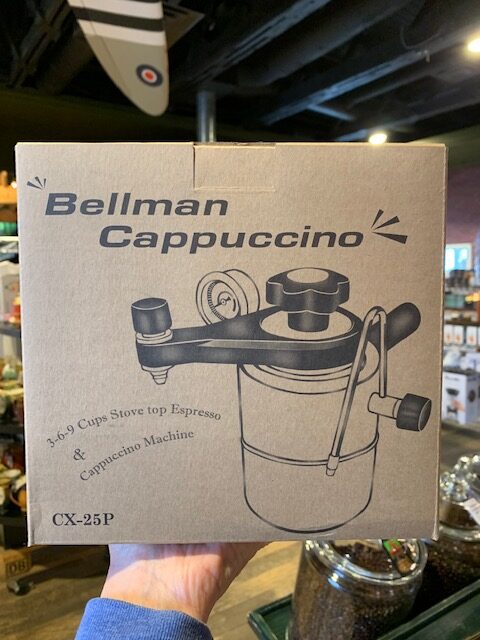
The Bellman Stove Top Espresso Brewer is a premium-quality stovetop espresso maker. It’s also a classic example of Italian craftsmanship. The brewer is precision engineered to produce rich, velvety espresso with every brew. With its stainless steel body, the Bellman Brewer blends functionality with aesthetics.
Features of the Bellman Stove Top Espresso Brewer
This brewer has many features that makes it an appealing choice. Size and cost are clear advantages, but there’s other benefits. These include its pressure gauge to its large capacity and more. It is perfect for making a simple cup of coffee for yourself, or making lattes for a group of friends.
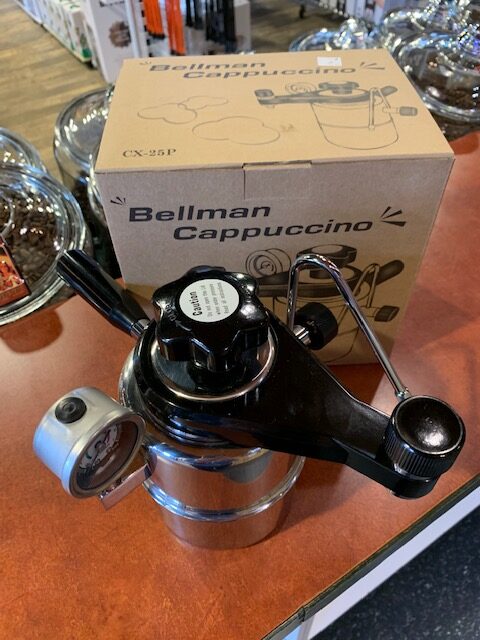
1. Dual-Purpose Design
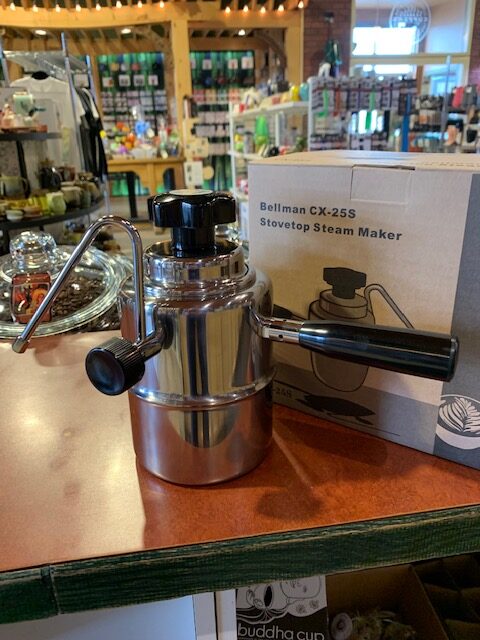
The Bellman Brewer is not only a versatile stovetop espresso maker but also a true milk steamer. It comes with a steam wand that allows you to froth milk with minimal effort. You can create the full range of specialty coffee drinks like lattes and cappuccinos.
2. Superior Build Quality
Crafted from high-quality stainless steel, the Bellman Brewer ensures durability and longevity. Its sturdy construction guarantees years of consistent performance. And with no electronics, there’s no issue of electric wear and tear.
3. Pressure Gauge
One of the most distinctive features of the Bellman is its integrated pressure gauge. This gauge allows you to achieve the perfect extraction for your espresso shot. You have full control of all pressure aspects with confidence.
4. Large Water Tank
The Bellman Brewer lets you brew many repeated shots of espresso before needing a refill. It’s a surprising feature for such a small, inexpensive espresso brewer. But having a large tank makes it perfect for enjoying coffee with family and friends.
5. Safety Valve
The Bellman Brewer has a built-in safety valve. If too much pressure builds up in the brewer, the excess steam will trigger the safety valve. This valve removes the guesswork around safety with the pressure building. It also gives much needed peace of mind during the brewing process.
How to Make Espresso with the Bellman Stove Top Brewer
Let’s dive into the brewing process with the Bellman Stove Top Espresso Brewer. Unlock the secrets to preparing your perfect cup of espresso!
How to Brew Espresso
1. Fill brewing chamber with water to the 3, 6, or 9 cup line. We use hot water to speed up the brewing process, but cold water works as well. Naturally, cold water takes a bit longer to heat.
2. Use the reducer plate to adjust the volume of the grounds basket. You set it based on how many cups of java you are making – either 3, 6, or 9 cups.
3. Screw the lid back on the Bellman Brewer. Make sure it is secured tight.
4. Place brewer on a stove-top. Fun fact: The Bellman Brewer works on gas, electric, and induction stoves. No more guesswork!
5. As your coffee brews the pressure gauge will rise. When it gets the yellow zone between 2 & 3 your coffee is READY TO GO.
6. Place a cup under the espresso nozzle and open the tap. Pour your coffee until the stream starts to sputter. Then turn the tap off and remove the brewer from the heat source. Coffee is done!
How To Steam Milk
1. Start with cold milk and milk pitcher. These pitchers are specific for making steamed milk. Fill the pitcher to between the MIN and MAX markings. (We recommend storing your steaming pitcher in your refrigerator between use.)
2. Insert/clip a milk thermometer into the pitcher. We use this to avoid scalding your milk, which is then too hot for a proper latte or cappuccino.
3. Purge the steam wand of built-up (often cold) water.
4. Insert steam wand into the pitcher. To start, only the steam wand tip should be below the surface. Open the steam wand so it starts to heat and swirl the milk in a circle.
5. As foaming begins, move the pitcher up and down the wand so that you can hear a sound like ripping paper. We call this sound “cha”. Chas are good – the more “chas”, the more foam you are building in your milk. Excellent milk foam has miniscule bubbles – a lofty goal as you gain experience.
6. When the thermometer registers 140 degrees, turn off the steam by closing the valve.
7. Clean your steam wand. Wipe the nozzle well with a hot, clean, damp cloth. Open the steam valve for 3-5 seconds to purge the wand of any residue milk.
8. As the finishing touch, polish your milk. Tap the pitcher on the counter to get rid of any bubbles, swirling the pitcher to circulate and polish the milk. Well textured milk should have the consistency of wet paint, and be shiny on top.
9. Now, slow pour your steamed milk into your espresso. This is where an experienced barista makes latte art based on the speed and style of pour. Check out this video one of our favourite baristas on how she does her latte art!
Expert Tips for the Best Espresso
Making espresso without an automatic espresso machine to do it for you is definitely a trained ability. Enhance your espresso game and create mad skills with these tips!
1. Use Fresh Roasted Coffee Beans
The quality of your espresso starts with quality coffee beans. Choose fresh roasted beans from a reputable roastery to guarantee freshness. We roast coffee every day, so our beans are always fresh, never stale. We primarily use our Rocket Brand Espresso for our espresso based beverages – Though depending on the time of year, you might also get one of our seasonal blends as your espresso!
2. Grind Size Matters
The right grind size is crucial for proper extraction. Too fine and too little liquid comes through the grinds. This makes a bitter, nasty brew. Too coarse of a grind, the liquid comes through too fast. This makes a brew that is weak and tasteless.
One article we will always be firm on is the type of grinder you use. You *must* use a burr grinder to achieve a consistent grind. Chop-style grinders are too inconsistent in the grind size for any espresso brewer. You will never be able to pull a good espresso shot with badly ground coffee. For more information on grind size check out our Definitive Guide to Coffee Grinders.
3. Clean and Maintain Your Brewer
To keep your Bellman Brewer in top-notch condition, clean it well after every use. It’s extra important to purge your steam wand before and after you use it. No one likes ‘steam wand cheese’!
Frequently Asked Questions (FAQs)
Does the Bellman Stove Top Espresso Brewer work on an induction stove?
Yes, the Bellman Stove Top Espresso Brewer works well on induction, electric, or gas stoves. It’s even small enough to take camping or in an RV. That’s one of it’s best features… aside from the great espresso.
Can I brew more than one shot of espresso at a time with a Bellman?
You bet! The Bellman Brewer’s large water tank allows you to brew up to 9 shots of espresso without refilling.
How do I know when the espresso shot is ready?
Keep your eye on the pressure gauge; once it reaches the optimal pressure (2.5ish), your espresso shot is ready.
Is it hard to use the steam wand on the Bellman for frothing milk?
Not at all. The steam wand is pretty straight-forward and easy to use. With a bit of practice and patience, you’ll be frothing milk like a barista pro.
Can I use pre-ground coffee with the Bellman Brewer?
You can. For best results we recommend grinding your coffee right before its brewed. We are also aware that not everyone has a coffee grinder, so if you want, we can grind your Cupper’s coffee for you.
Is the Bellman Stove Top Espresso Brewer easy to clean?
Yes, the stainless steel construction makes it easy to clean. With proper maintenance, it will provide years of service.
Shopping Cart
It's the Long Weekend!
It’s supposed to be the hottest of all the annual long weekends…
We’re just hoping it won’t be chilly, smoky, rainy, mosquito-y… all those things!
No matter what, it’s time to take a break…
so we’re closed on Monday, August 3rd for the long weekend.
Saturday, August 1 – 9:00 am to 5:00 pm
Monday, August 3 – CLOSED
Tuesday, August 4 – 9:00 am to 5:30 pm
Have a fantastic, relaxing long weekend. Be safe, and we’ll see you back soon!
Local Delivery Schedule
Thank you for your order and request for delivery. Deliveries are completed the same day,
Monday through Friday (excluding stat holidays) if received by 1:00 pm that day.
Any received after that time will be delivered the next business day.